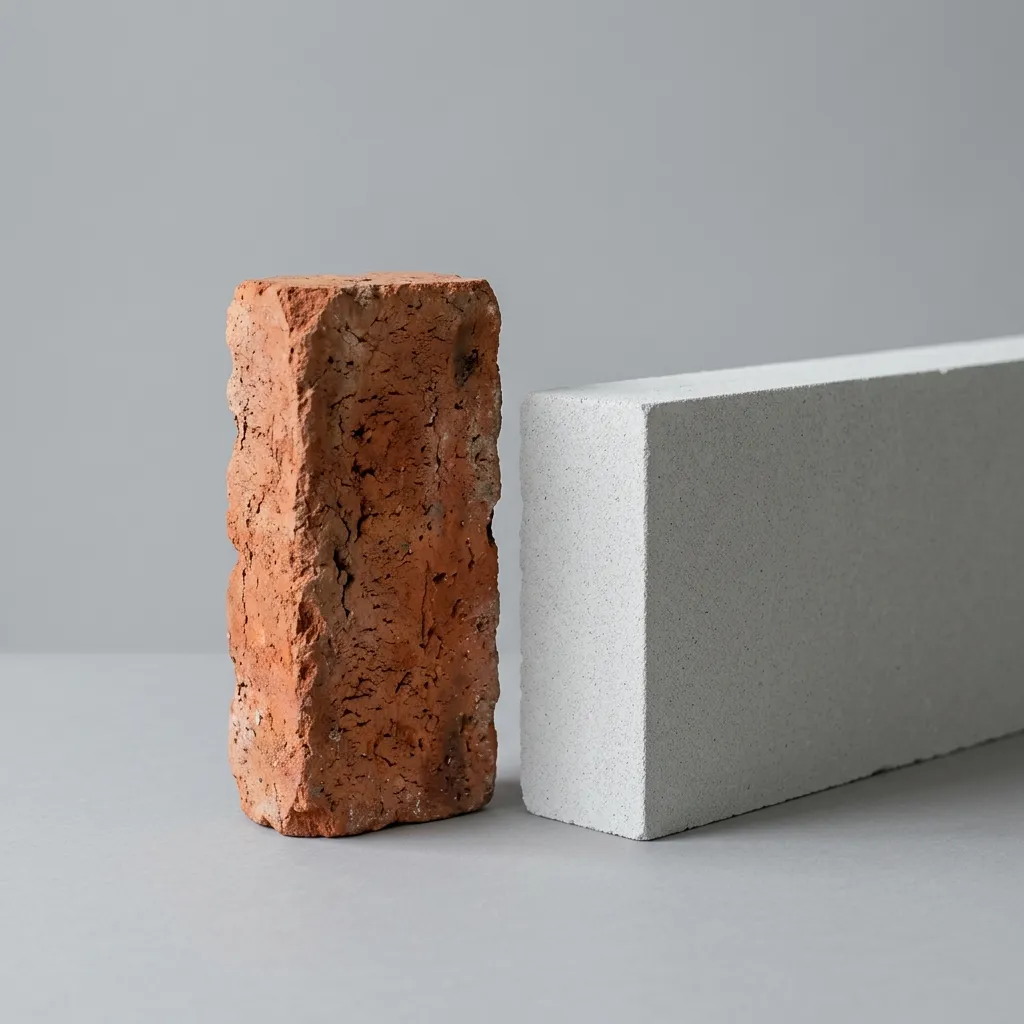
Autoclaved Aerated Concrete (AAC) blocks have revolutionized on site construction by replacing traditional clay bricks in load bearing and non load bearing masonry. However, because AAC blocks have distinct material properties, including high dimensional precision, cellular porosity, and a low thermal expansion coefficient, traditional sand cement bricklaying methods cannot be used. Utilizing traditional 12mm mortar joints and wet curing on AAC walls is a recipe for joint cracking, thermal bridging, and structural failure.
To achieve the maximum benefit of AAC blockwork, such as structural integrity, rapid construction speeds, and zero cracking, builders must adopt specialized thin bed masonry techniques. This guide outlines the professional tools, mortar parameters, structural anchoring configurations, and chasing guidelines required to construct high performance AAC walls.
1. Specialized Masonry Tools for AAC
Because AAC blocks can be easily cut, routed, and shaped, they allow for high dimensional accuracy. However, achieving this requires a specialized tool kit on site:
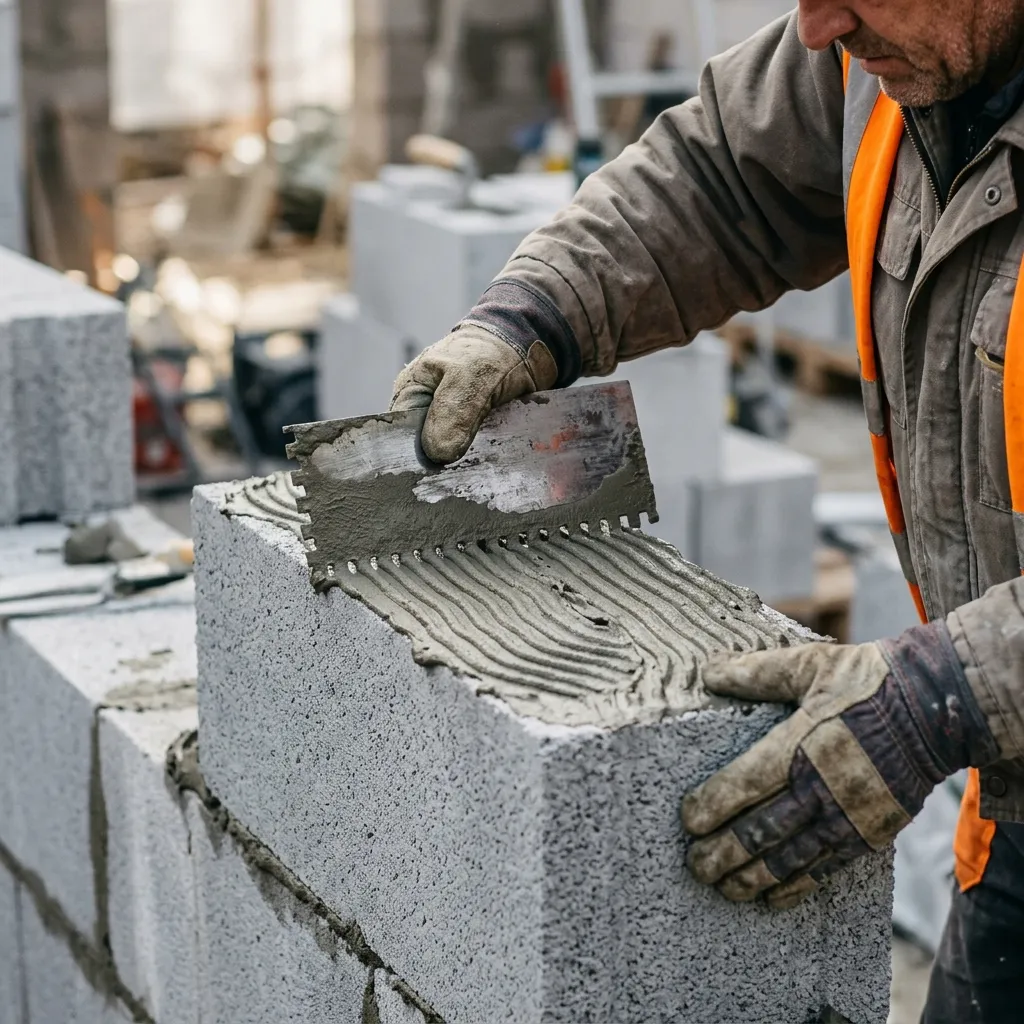
- Notched Trowel: Unlike traditional flat trowels, an AAC trowel features a notched edge (typically square notched) designed to distribute thin bed mortar at a consistent thickness. The width of the trowel must match the exact thickness of the block being laid (e.g., 100mm, 150mm, or 200mm).
- Rubber Mallet: Used to tap blocks into alignment. Steel hammers must never be used on AAC as they will crush the cellular structure.
- Manual Hand Saw or Band Saw: AAC blocks can be cut easily. A coarse toothed hand saw or a portable electric band saw ensures square, dust free cuts for corner closures.
- Chaser: A manual hand router or an electric wall chaser used to cut clean conduits for electrical piping and sanitary lines.
- Rasp / Sanding Board: Used to level minor irregularities between courses, ensuring a perfectly flat surface before the next course is placed.
2. The Science of Thin Bed Joint Mortar
Traditional bricklaying uses a 10mm to 15mm thick layer of sand cement mortar. For AAC, this is replaced by a 2mm to 3mm thin bed mortar. This thin joint is made possible by the near perfect dimensional tolerance of the blocks (+/- 1.5mm) and is chemically necessary for several reasons:
Thermal Performance: Standard sand cement mortar has high thermal conductivity. A 12mm mortar joint acts as a "thermal bridge," leaking heat through the wall. Reducing the joint thickness to 2-3mm with polymer modified adhesive eliminates thermal bridging, preserving the insulation values of the AAC block.
Thin bed mortar is a factory blended dry mix consisting of Portland cement, graded sand, and polymer additives (such as methyl cellulose). The polymer additives serve a vital purpose: they retain water within the mortar. Because AAC has high water absorption, standard mortar would dry out almost instantly, starving the cement of the water needed for hydration and leading to bond failure. Polymer modified adhesive retains water within the joint, allowing full chemical curing without pre soaking the blocks or post laying water curing.
3. Step by Step Construction Method
Step 1: The Leveling Bed (First Course)
The first course of AAC blocks is the most critical. Any level discrepancy in the first course will multiply as the wall rises. To compensate for slab unevenness, the first course must be laid on a traditional 1:4 sand cement leveling mortar bed (10mm to 20mm thick). A waterproofing dpc (damp proof course) membrane should be placed beneath this leveling bed. Use a spirit level and alignment string to ensure the first course is perfectly level, both horizontally and vertically.
Step 2: Thin Bed Adhesive Application
Mix the polymer modified adhesive with clean water using a mechanical paddle mixer until a paste like consistency is achieved. Let it stand for 5 minutes to activate the polymers, then remix. Apply the adhesive to both the horizontal bed joint and the vertical head joint using the correct notched trowel. Comb the adhesive to form ridges. The mortar thickness should be uniform between 2mm and 3mm.
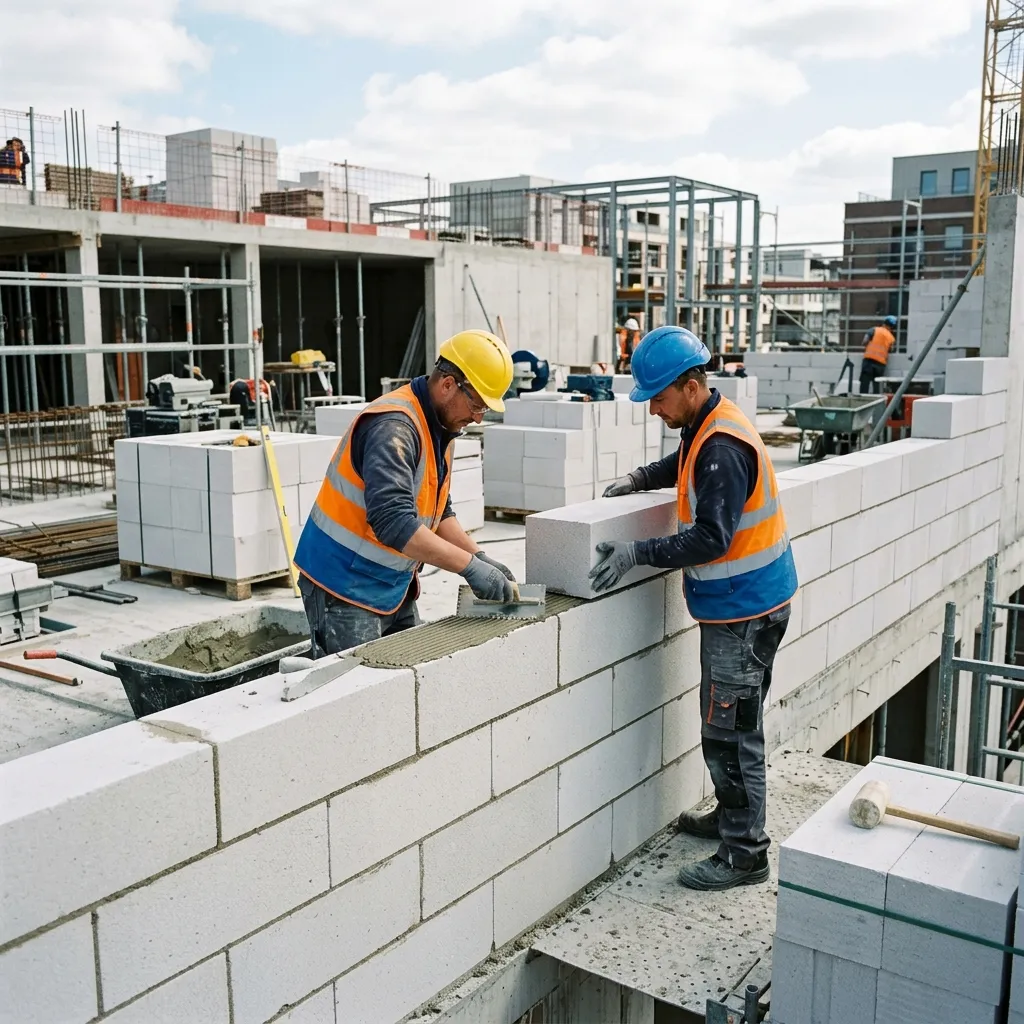
Step 3: Laying and Aligning Blocks
Place the block firmly onto the adhesive bed. Slide it horizontally against the vertical joint of the adjacent block. Tap the block with a rubber mallet until it is fully aligned with the guide string. Ensure all vertical joints are offset by a minimum of 100mm (bond pattern). Clean off any squeezed out adhesive immediately before it cures.
| Parameters | Thin Bed Mortar Joint | Traditional Sand Cement Mortar |
|---|---|---|
| Joint Thickness | 2 mm - 3 mm | 10 mm - 15 mm |
| Tensile Adhesion Strength | ≥ 0.8 N/mm² | ≤ 0.3 N/mm² |
| Water Curing Required | None (Self curing due to polymers) | Minimum 7 Days wet curing |
| Thermal Bridging Effect | Negligible (Thermal envelope intact) | High (Leads to condensation spots) |
| Wastage on Site | ≤ 1% (Premixed bags) | 10% - 15% (Sand cement mixing loss) |
4. Wall Reinforcement and Anchoring Details
While AAC blocks have excellent compressive strength, their tensile and shear strengths are lower. To prevent structural cracking from thermal expansion, concrete shrinkage, or wind loads, walls must be reinforced and anchored correctly:
Horizontal Bond Beams (Every 3rd Course)
In high seismic zones or for long walls (lengths exceeding 4 meters), horizontal reinforcement must be embedded in the wall. Using a router or manual chaser, cut two parallel grooves (15mm x 15mm) on the top surface of the 3rd, 6th, and 9th courses. Insert two 8mm deformed steel rebars into the grooves, and fill them completely with cement grout or thin bed adhesive. This horizontal bond beam absorbs tensile stresses, preventing step cracks.
Structural Column Anchoring (L Clamps)
AAC walls should never be rigidly bound to concrete columns or shear walls, as column deflection can induce shear cracks in the blocks. Instead, connect the wall to the RCC frame using flexible L clamps (flat tie anchors) made of galvanized steel. Fasten the clamp to the concrete column using anchor bolts and embed the flat end directly into the horizontal thin bed adhesive joint of the AAC block every 2nd course.
5. Conduit Chasing & Sanitary Piping
One of the primary B2B benefits of AAC is the ease of installing electrical and plumbing conduits. Unlike clay bricks, which require hammer chipping that damages the wall, AAC is routed using mechanical wall chasers. However, builders must follow structural depth limits:
- Depth Limit: The depth of vertical chases must not exceed 1/3 of the block thickness (e.g., max 33mm depth in a 100mm wall).
- Horizontal Chases: Horizontal chases reduce the load bearing capacity of the wall and must be strictly avoided. If horizontal routing is necessary, keep it under 1.0 meter in length and limit the depth to 15mm.
- Conduit Grouting: Once pipes are laid, fill the chases with non shrink grout or polymer modified cement plaster. Apply a fiber glass mesh (150mm wide) over the chase line before plastering to prevent surface cracks.
6. Plastering & Finishing Guidelines
Traditional sand cement plaster applied directly to dry AAC blocks will fail. AAC's high suction rate draws moisture out of the wet plaster, causing it to shrink, detach, and crack. To prevent this:
- Surface Primer: Apply a primer coat or a water repellent basecoat (spatter dash key coat) to regulate the wall's suction rate.
- Polymer Plaster / Gypsum: Use polymer modified premixed cement plasters, or apply gypsum plaster directly for interior walls. Gypsum behaves exceptionally well on AAC as it does not require wet curing.
- Glass Fiber Mesh: Install a 4mm x 4mm glass fiber mesh at all joints between AAC blocks and RCC members (beams, columns) to absorb differential settlement stresses.
By enforcing these standard operating procedures on the job site, developers can deliver crack free, thermally isolated, and structurally sound masonry walls that double the speed of project execution.
B2B Turnkey Setup Solutions Across Maharashtra & India
As a leading engineering company based in Satara, Maharashtra, Balaji Construction Machines and Spares delivers automated autoclaved aerated concrete manufacturing plants nationwide. We specialize in layout engineering, site commissioning, and operator training for customers in major industrial zones around Mumbai, Pune, Nagpur, Nashik, and Aurangabad.
Our installation reach covers key construction markets across Indian states like Gujarat, Madhya Pradesh, Karnataka, Telangana, Andhra Pradesh, and Tamil Nadu. Whether you are running a setup cost estimation for a new factory, looking up detailed machinery specifications, or interested in starting a sustainable B2B business, we provide complete engineering support. Contact our sales team to schedule a technical consultation at your site.